This post describes how to create model with correct selection of package which leads to correct development approach either Extension or Overlayering (Customization)
Go to Dynamics 365 or AX7 | Deploy | Create model

Enter required information as shown

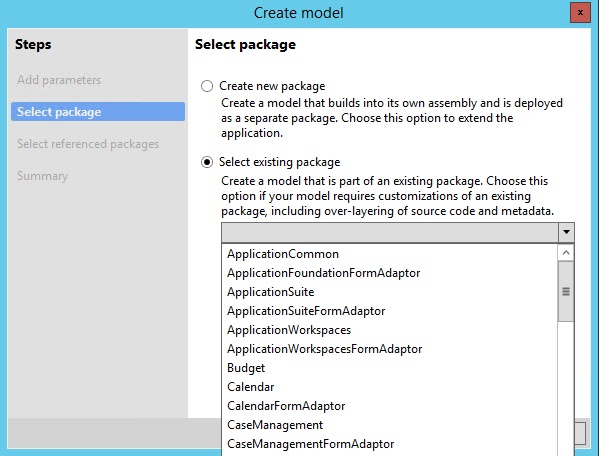
Choose correct package

If you decided to go with overlayering, existing package will be selected from dropdown.
Select referenced packages
For this example; I will go with extension development approach, it is easy to upgrade with new versions or updates coming from MS.
Marked all required packages (models) which can be referenced through your new created model. Through these references, you can actually use the element living in those packages (models), without these references you cannot access any element belongs to a different model.
Lets' say you want to access CustTable which belongs to Application Suite package then you have to checked Application Suite package in referenced package list.

Create model Summary
Create new project option will open a new window where you can put the project name linked with this model.
NOTE: A project can only be linked with one model

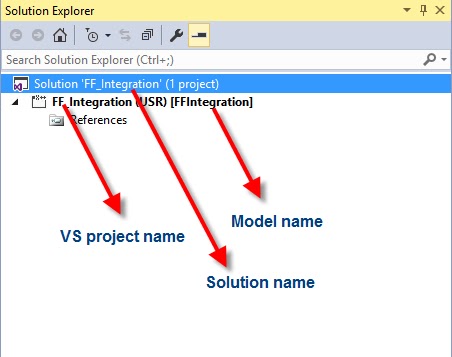
Project created in Visual Studio
Update model parameters
You may require updating model parameters by adding more reference packages. This can be done as follows;

Select model name to update

Add or remove reference packages

Click Next will take you model summary screen and will update the project in Visual Studio with updated references.
Go to Dynamics 365 or AX7 | Deploy | Create model
Enter required information as shown
Choose correct package
If you decided to go with overlayering, existing package will be selected from dropdown.
Select referenced packages
For this example; I will go with extension development approach, it is easy to upgrade with new versions or updates coming from MS.
Marked all required packages (models) which can be referenced through your new created model. Through these references, you can actually use the element living in those packages (models), without these references you cannot access any element belongs to a different model.
Lets' say you want to access CustTable which belongs to Application Suite package then you have to checked Application Suite package in referenced package list.
Create model Summary
Create new project option will open a new window where you can put the project name linked with this model.
NOTE: A project can only be linked with one model
Project created in Visual Studio

Update model parameters
You may require updating model parameters by adding more reference packages. This can be done as follows;

Select model name to update
Add or remove reference packages
Click Next will take you model summary screen and will update the project in Visual Studio with updated references.

Thank you for sharing the blog.
ReplyDeleteMicrosoft Dynamics Online Training
Informative blog. Thank you for sharing with us..
ReplyDeleteD365 Finance and Operations Online Training
Thanks for sharing this informative article on MS Dynamics 365 - Create Model and Project. With important practical screenshot. If you have any requirement to Hire MS Dynamics CRM consultant to accelerate your company's success by evaluating new solutions and customizing existing ones with Microsoft Dynamics. Please contact us.
ReplyDeleteThis comment has been removed by the author.
ReplyDelete